Limited WiFi connection problem in Windows 10/8.1

Limited WiFi connection

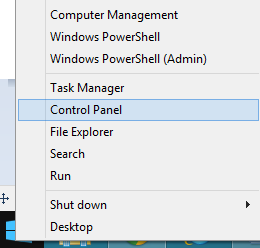
First create a system restore point. Then right-click the ‘Start’ button to access ‘Control Panel’ option and select it.


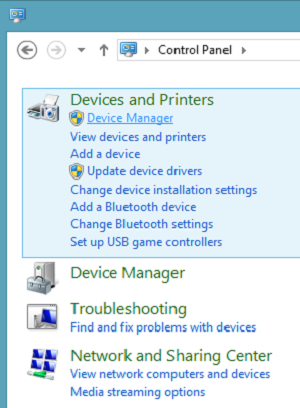
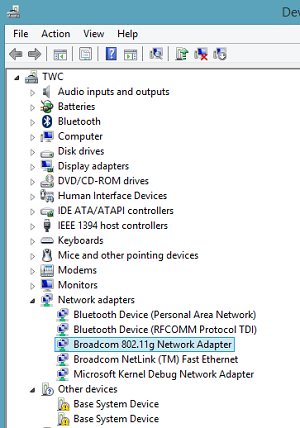
Next, choose ‘Device Manager’ option.

Next select ‘Network Adapters’ and under it, you will find a Wi-Fi controller listed. Select it.

Double-click the controller to open the adapter’s Property window and switch to ‘Drivers’ tab.

Next, click the ‘Disable’ button and hit ‘Ok’ to apply the changes. See if it helps. If it does not help, re-enable it and proceed to the next step.

If the above solution fails, try doing the following.

Open an admin-level command prompt in Desktop mode, type the following commands, and hit Enter after each command:

netsh int tcp set heuristics disabled  
netsh int tcp set global autotuninglevel=disabled
netsh int tcp set global rss=enabled

Then type the following and hit Enter, to verify that practically all the settings are disabled.

netsh int tcp show global

Finally, reboot your machine and see if this helps.

You may also try this:

Open Command Prompt as Administrator and run the following commands

sc config licensemanager type=own

Restart the computer and see if it has helped.

If it doesn’t help, you could also try the built-in Hardware and Devices troubleshooter and see if it helps.

………………………………………… Thank you………………………………………………

Solving Error 0x00000709: “Can’t Set Default Printer” Problem

If you get this message Operation could not be completed(error 0x00000709). Double click the printer name and make sure that the printer is connected to the network when you fail to set your printer as the default one, you’re not alone. 


This is an Error Message

Solution

1) Click the Start button, then type regedit and press Enter

2) Follow the path 

HKEY_CURRENT_USER\Software\Microsoft\WindowsNT\CurrentVersion\Windows.


3) Double-click Device. Type in your printer name. (The screen shot here is an example only.)

Click OK to save the change. Note: If you encounter this sort of error “Cannot edit Device: Error writing the value’s new contents“, please follow the steps below to set the permission of the key. 


a) Right-click the Windows key on the left side of the panel and then click Permissions…

b) Tick the box Allow for Full Control and Read, then click Apply and click OK to save the change. 

4) Right-click UserSelectDefault and click Rename to rename it as your printer name. 

There you go! You should be able to set up your default printer now! 

After setting up your printer, you will need update your printer driver for it to work more smoothly. If you don’t have the time, patience or computer skills to update the printer driver manually.

……………………Thank you…………………..

An error appears when attempting to uninstall the Canon MP Drivers in Windows

Description

An error appears when attempting to uninstall the MP Drivers in Windows

Solution

MP Drivers Uninstall

When attempting to uninstall the MP Drivers in Programs and Features, the message ‘Printer driver is currently in use‘ may appear.

Printer driver is currently in use. If you are not using the printer driver, it may be used by other users on this computer.
Exit all applications and printer properties and then try again.
If you still have a problem, restart the computer and then try again.

Resolution:

  1. Confirm no pending print jobs are queued.
    1. On the computer’s keyboard, press and hold the Windows button.
      The Windows button can be found between the Control (CTRL) and ALT buttons, just to the left of the space bar.
       
    2. Now, press the letter ‘R’.
      The Run window should appear.
       
    3. In the Open text box, type spool and then click OK.
      Windows Explorer window should open to the Local Disk (C:)\Windows\System32\spool folder.
       
    4. Double-click the PRINTERS folder in the larger pane on the right side.
       
    5. If there is a file in this folder, highlight it. If there are multiple files, you can highlight them all.
      To highlight one or all files, press and hold the CTRL and letter ‘A’ buttons on the keyboard.
       
    6. Now, delete the files by holding down the CTRL and letter ‘D’ buttons on the keyboard.
       
    7. Close the Windows Explorer window.
       
  2. Open Devices and Printers.
    Click here for instructions to open Devices and Printers.
     
  3. On Devices and Printers window, click on the driver icon to select it. At the top menu, click Print server properties.
     
  4. On Print Server Properties window, click Drivers tab.
     
  5. Under the Name column, find and select the printer driver you want to delete.
     
  6. Click Remove… button.
     
  7. On the Remove Driver and Package window, click Remove driver only radio button and then click OK.
     
  8. When prompted to confirm deletion of the printer driver, click Yes.

    Important:
    • Two printer drivers may have installed. One titled Canon Inkjet XXX series and the other Canon XXX series Printer; where XXX is the model name.
      Repeat steps 6 through 9 to delete the second driver.

      Hint: Two printer drivers will appear if the printer is connected to an access point that has Internet access.
       
  9. Once the printer driver is deleted, close the Print Server Properties and Devices and Printers windows.

    Important:
    • If the following message appears trying to delete one of the printer drivers, confirm the icon is still selected (highlighted) in Devices and Printers and then click Remove device button from the top menu.

      Message: Unable to remove Canon XXX series Printer, x86, Type 3 – User Mode driver. The specifiied printer driver is currently in use.


  10. The Programs and Features window should still be open. If it’s not open, click here for instructions to open it.
     
  11. Now attempt to uninstall the MP Drivers from Programs and Features.

………………………..Thank you………………………….